Step 1: Create customer and offer
After logging in, double-click on the Documents node in the Navigator and the nodes below it become visible.
Now the Offers node is highlighted.
The next step is to click once on the symbol  for entering a new document in the quotation header overview.
.png)
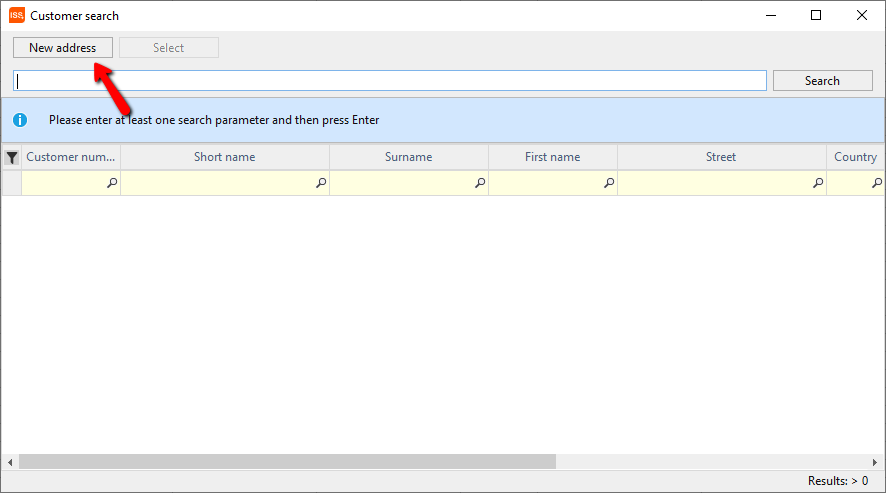
The Customer Search screen opens, in which you can select an existing customer or create a new customer.
Clicking on [New Address] opens the address quick entry .

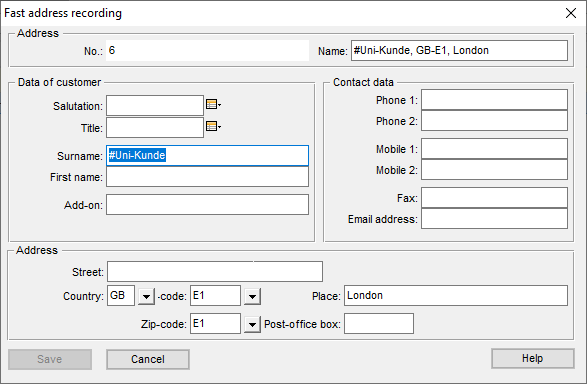
The most important customer data is now entered in the Address Quick Entry screen.
Surname
Forename
Street
Country, postal code, city and the
Telephone number.
To save all data and close the mask, click on the Save button.

The first offer has already been created and you should now enter a name for this offer in the Subject cell and finish with the Enter key.

Step 2: Enter positions
In order to create a position in this offer, click once on the symbol  to enter a position.

A new row is created in the position window, the cursor flashes in the Model cell. The desired model code is now entered in this cell or the model search is opened using the F4 function key .
An example of how to configure an item from the various suppliers can be found in the included documentation.
These steps are now repeated until all desired positions have been recorded. Finally, click on the icon  to end the capture or press the ESC key on the keyboard.
Step 3: Print the offer
To print out the offer, select the symbol  to open the text editor in the upper area of the window.

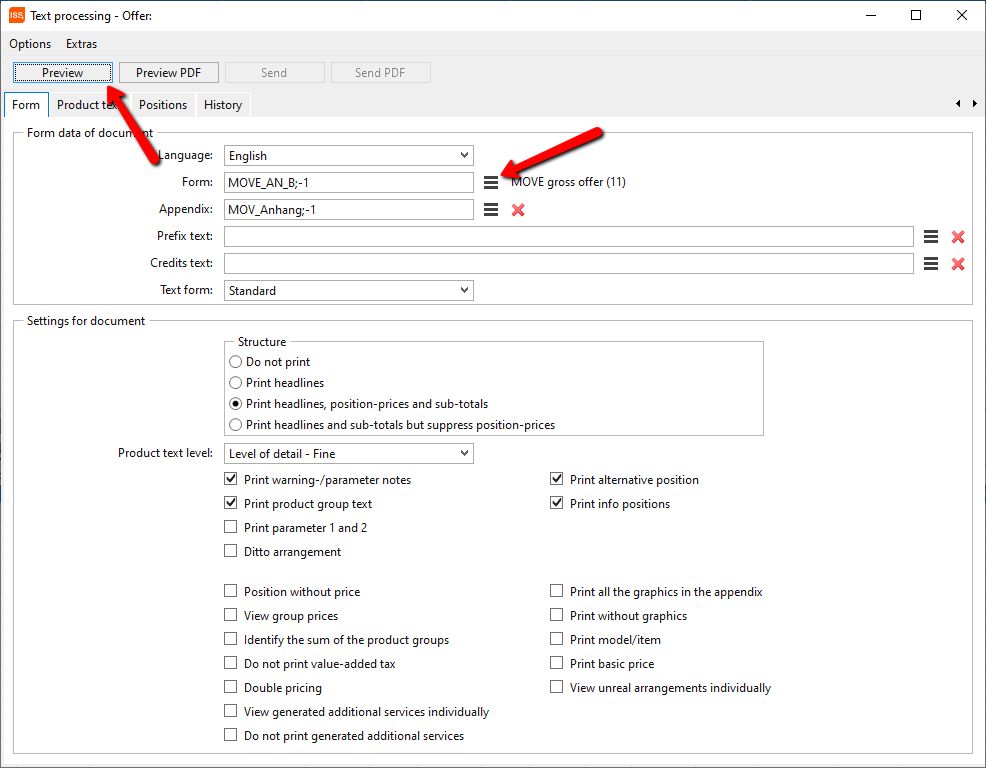
In the new Text Editing - Offer window, select any form on the right side and click.

It will now open the text editor and show you a preview. These can now be further edited as desired and possibly printed.
If you would like more information and help, please contact our hotline staff.